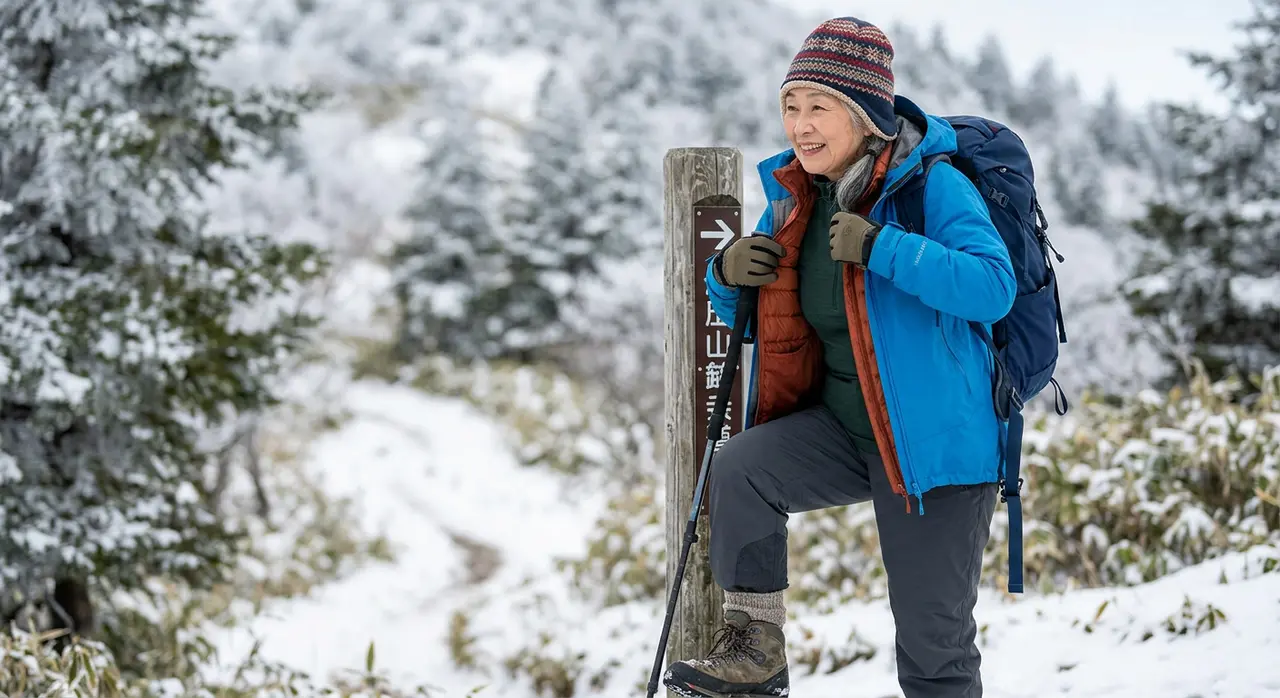
The Core Problem: You're Either Too Hot or Too Cold
Hiking generates enormous amounts of body heat. At a moderate pace with elevation gain, you're generating 5–10x your resting metabolic heat output. Put on too much insulation and you overheat, sweat heavily, saturate your base layer, and then when you stop moving, at a viewpoint, a lunch break, a summit, that wet base layer conducts heat away from your body 25x faster than dry fabric. You go from hot to dangerously cold in minutes.
The solution isn't more insulation, it's the right system. A three-layer approach that you actively manage throughout the day is what separates comfortable cold-weather hikers from miserable ones.
The Three-Layer System
Base Layer: Moisture Management
Your base layer is against your skin. Its job is to move sweat away from your body so it can evaporate. The critical rule: never cotton. Cotton absorbs sweat and holds it against your skin. In cold conditions, wet cotton is a hypothermia risk. Use synthetic (polyester, nylon) or merino wool.
Merino wool vs. synthetic for cold hiking:
- Merino woolregulates temperature better, resists odor for multi-day trips, stays warmer when slightly damp, softer against skin. Heavier, more expensive, dries slower than synthetic.
- Syntheticlighter, dries faster, less expensive, more durable. Picks up odor faster. Better for high-output activities where sweat rate is high.
For cold hiking, a midweight merino base layer (200–250 g/m²) works across a wide temperature range. For hard aerobic efforts in the cold, lightweight synthetic moves moisture fastest. For summit days with low output and high exposure, merino's warmth-when-damp advantage is worth the weight.
Mid Layer: Insulation
The mid layer traps body heat in dead air space. How much insulation you need depends on temperature, wind, and your exertion level. In practice, most cold-weather hikers use one of two approaches:
Fleece mid layer: Classic, durable, breathable, and inexpensive. Polartec 200 weight fleece (Patagonia R2, REI Co-op Midlayer) handles most cold hiking conditions. Fleece stays warm when damp (unlike down) and breathes well enough to use while moving. The limitation is bulk, fleece doesn't compress well.
Synthetic insulated jacket: Synthetic fill (Primaloft, Thermoball, Coreloft) packs smaller than fleece, handles moisture better than down, and provides reliable warmth for rest stops and low-output hiking. A synthetic puffy in the 60–100g fill range works as either a mid layer or outer layer in mild cold. The tradeoff is breathability, synthetics run warmer and you'll dump heat faster if you're moving hard.
Down mid layer: The warmest insulation per gram, but down loses nearly all its insulating ability when wet. Use down in dry conditions, in the PNW or Southeast in shoulder season, stick to synthetic.
Outer Shell: Wind and Precipitation
The shell's job is blocking wind and precipitation, not providing warmth. A shell with no insulation (a hardshell or softshell) is the correct outer layer for most cold hiking, warmth comes from what's underneath. Key shell properties for cold hiking:
- Windproofingwind strips heat from your body dramatically. A 20-mph wind drops the effective temperature by 10–20°F. A windproof shell changes everything.
- Waterproofingfor rain or wet snow, a hardshell with taped seams (Gore-Tex, eVent, H2No) is essential. Softshells handle light moisture but soak through in sustained rain.
- Breathabilityhardshells are less breathable than softshells. If you're moving hard in cold, dry conditions, a softshell breathes better and avoids internal condensation. If rain is certain, the breathability tradeoff is worth the waterproofing.
Managing Your Layers on the Trail
The biggest mistake in cold hiking: keeping the same layers on all day. The right approach is constant adjustment. A few practical rules:
- Start cold. Begin hiking with slightly less insulation than feels comfortable at the trailhead. You'll warm up within 10–15 minutes. If you start warm, you'll be sweating heavily before you hit your stride.
- Stop before you're wet. At the first hint of overheating, before visible sweat, remove a layer. Vent the shell first (unzip), then remove the mid layer if still warm. Don't wait until you're soaked.
- Add layers before you stop. At rest stops, put on insulation immediately, don't wait until you're cold. Your body temperature drops fast when you stop moving.
- The puffy goes in the pack, not the pack lid. Store your insulating layer where you can access it fast, not buried under your lunch. A top-loading access point or a side pocket works well.
Extremities: Hands, Head, and Feet
Hands
Your hands lose heat fast, a significant fraction of your total heat loss occurs through bare hands. The system that works best: liner gloves under waterproof mittens. Liner gloves alone fail in sustained cold. Mittens are warmer than gloves for the same insulation weight because fingers share heat. When you need dexterity for navigation or photography, slip off the mitten and use the liner. When you stop, mitts go back on immediately.
For most cold hiking (20°F to 35°F), a fleece or synthetic liner plus a waterproof shell mitten covers the range. Below 0°F, add an insulated mitten as the outer layer.
Head
You lose 30–40% of body heat through your head, the oft-cited figure is exaggerated, but the head does represent a disproportionate heat loss point because it's rarely insulated the way the rest of your body is. A simple merino beanie or fleece hat adds meaningful warmth for almost no weight. A balaclava that covers the neck and face is essential below 20°F or in significant wind. Many hardshells have integrated hoods that provide waterproof head cover without extra weight.
Feet
Cold feet are often a circulation problem, not a sock problem. Boots that are too tight, especially when overworn with too many sock layers, restrict circulation and make feet cold faster than bare socks. One quality pair of midweight merino wool hiking socks (Darn Tough, Smartwool, Icebreaker) in properly fitted boots outperforms two pairs of cheap cotton socks stacked.
For sub-freezing temperatures on snowshoe hikes or winter approaches, insulated boots rated for the temperature are necessary. For cold but dry conditions on maintained trails, insulated trail shoes (Salomon X Ultra 4 GTX, Keen Targhee III with insulation) add warmth without the stiffness of mountaineering boots.
Nutrition and Hydration in Cold Weather
Staying warm is partly a calories problem. Your body burns significantly more fuel keeping itself warm in cold conditions, up to 400 additional calories per day in cold environments. Eat more, specifically high-fat foods that provide slow-burning fuel (nuts, hard cheese, olive oil-heavy foods). Do not skip meals or snacks in cold weather.
Dehydration worsens cold tolerance significantly. The sensation of thirst is suppressed in cold air, so you drink less, but your respiratory system loses water vapor with every breath in dry winter air. Drink on a schedule (every 20–30 minutes) rather than waiting for thirst. Insulate your water bottle or use an insulated reservoir, uninsulated water freezes fast in cold conditions.
How to Stay Warm on Cold Hikes FAQs
There's no universal limit, it depends on your gear, fitness, experience, and conditions. With proper layering, most hikers are comfortable down to single digits (°F) in dry conditions with little wind. Below -10°F or in high wind combined with low temperatures, conditions become genuinely dangerous and require specialized gear and experience. Start with trails in the 15–35°F range if you're new to cold hiking.
Yes. Cotton absorbs and holds moisture, sweat, rain, stream crossings, against your skin. Wet cotton has essentially no insulating value and actively conducts heat away from your body. On a cold, windy day, a soaked cotton sweatshirt creates real hypothermia risk within 30–60 minutes of stopping movement. Use wool or synthetic for any layer touching your skin in cold conditions.
Synthetic for damp, rainy, or variable conditions (Pacific Northwest, Eastern mountains, shoulder season). Down for dry, cold conditions where weight and pack size matter most (desert Southwest in winter, Colorado alpine in dry months). Down loses most of its insulating value when wet; synthetic retains significant warmth even soaked.
Carry an insulated water bottle (Hydro Flask, Nalgene with an insulating sleeve) or an insulated reservoir. Store your water bottle upside-down, ice forms from the top, so the drinking hole stays open longer. In extreme cold, carry your water inside your pack against your body. Chemical hand warmers next to a bottle in a side pocket can prevent freezing on short cold days.
Usually circulation restriction (too-tight glove or restricted wrist), insufficient insulation, or damp gloves. Try mittens instead of gloves, fingers sharing heat stay warmer than individual fingers. Make sure gloves aren't compressing your wrist. If your core is cold, your body prioritizes warming core organs over extremities, addressing core warmth (add a mid layer) often fixes cold hands faster than changing gloves.