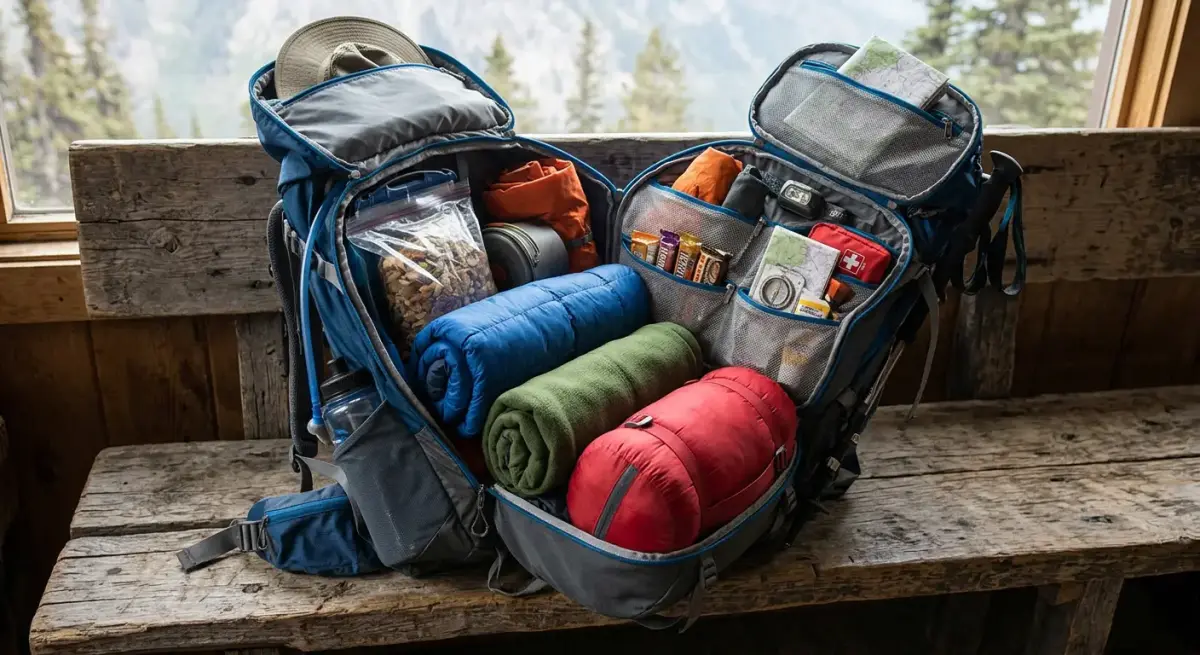
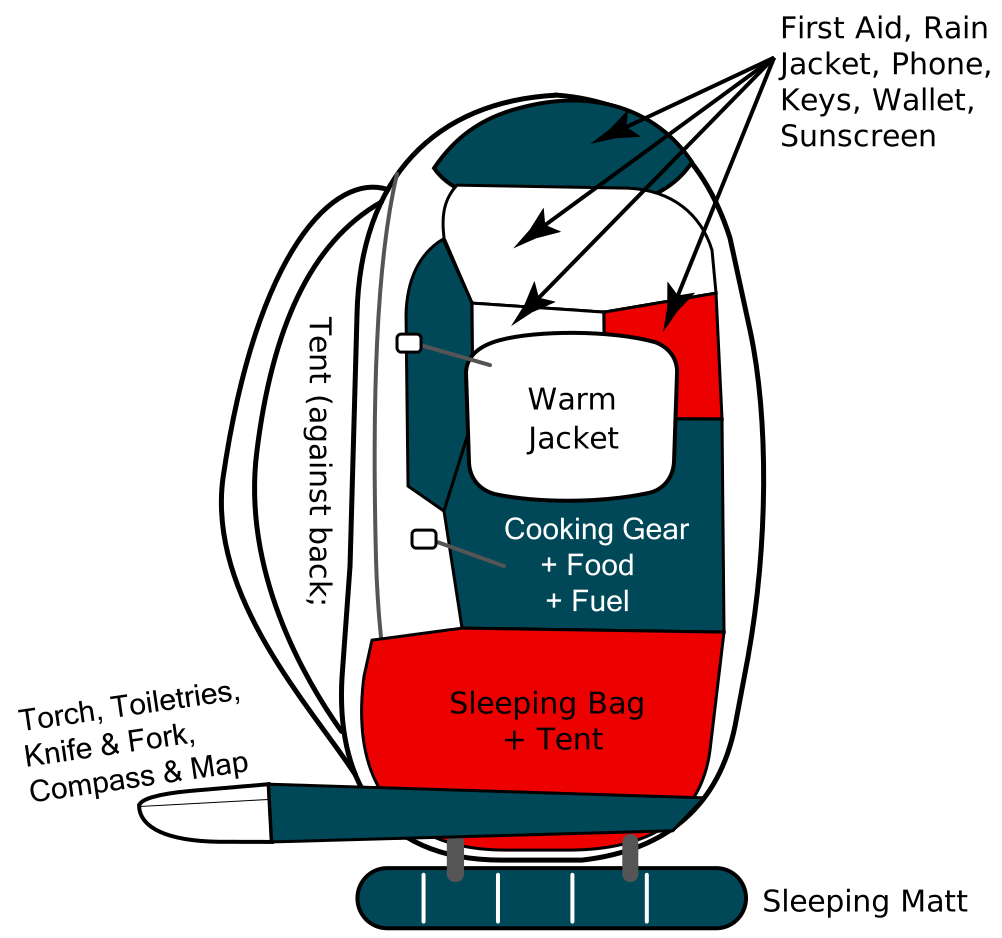
How you load a pack changes how heavy it feels far more than what you put in it. The order below is the standard one, bottom to top, and the diagram shows where each layer sits.
Step 1: Pack the bottom, light and bulky
Start at the bottom with the light, bulky things you will not touch until camp: sleeping bag, sleeping pad, spare clothes. They are soft and compressible, so they form a stable base for everything stacked above them.
Keeping the lightweight gear down here improves weight distribution and stops the pack feeling unbalanced on the trail. Think of this layer as the foundation: light, soft, and needed only once you stop walking.
Step 2: Pack the middle, heavy and close to your back
The middle is the part that decides how the pack carries. Water reservoir, food and cooking gear go here, centred and pressed up against your back.
That keeps the mass near your natural centre of gravity, takes the strain off your shoulders and holds your balance on uneven ground. If you remember one rule from this page, make it this one: heavy items live close to your spine.
Step 3: Fill the outer middle with medium-weight gear
With the heavy items set, pack the space around them with medium-weight kit: extra layers, a rain jacket, the first aid kit.
This is not filler. It removes the empty pockets inside the pack that let things shift while you walk, and a tightly packed bag is noticeably steadier over a long day.
Step 4: Pack the top for quick access
The top is for whatever you need without stopping properly: snacks, sunscreen, gloves, headlamp, map or GPS.
Anything you would otherwise unpack the whole bag to reach belongs up here. Keep it light, though, or the pack turns top-heavy.
Step 5: Use the external pockets deliberately
Outer pockets are for things you want in hand without opening the main compartment: water bottles, trekking poles, wet gear, rubbish.
Used well they keep the main compartment tidy and the day moving. Used badly they are where small things go to be lost.
Step 6: Adjust it, which matters as much as packing it
A correctly packed bag still carries badly if it is not adjusted. Pull the compression straps in to stabilise the load, set the shoulder straps, then seat the hip belt snugly on your hips.
Most of the weight should ride on your hips, not your shoulders. Getting this right is the difference between a pack you stop noticing and one you count the miles with.
The mistakes that make a pack feel heavier than it is
Small packing errors cost more comfort than most people expect. The common four:
- Heavy items far from your back. The load levers away from your spine and pulls on your shoulders.
- Empty space left inside. Gear shifts as you move, and the pack sways with every step.
- Frequently used things buried deep. You either stop constantly or go without.
- Overpacking. Aim for 10 to 15 percent of body weight on a day hike, 20 to 25 percent backpacking. Weigh it before you leave.
Pack it in the order above and the same weight rides better, balances better and tires you less.
How to Pack a Hiking Backpack FAQs
Heavy items like a tent body, bear canister, and food should go closest to your back, centered between your shoulder blades and your hips. This keeps the weight close to your center of gravity and reduces strain.
For a day hike, keep rain gear and snacks in the top lid or brain pocket. For overnight, pack sleeping gear at the bottom, heavy items next to your back in the middle, and clothing and insulation around the sides.
Target 10 to 15 percent of your body weight for day hikes and 20 to 25 percent for backpacking. Weigh your pack before every trip. The three heaviest items to reduce are the shelter, sleep system, and the pack itself.
The top pocket, or brain, is for frequently accessed items: rain jacket, sunscreen, snacks, trail map, headlamp, and first aid kit. Keep it light so it does not make the pack top-heavy.
Use a pack rain cover for sustained rain; most backpacks come with one in the bottom pocket. Line the inside with a trash compactor bag as a secondary layer, and pack electronics and your sleeping bag in dry bags.
At the very bottom of the main compartment. Sleeping bags are light and bulky, you will not need one until camp, and it doubles as padding against your lower back.