Why the Layering System Works
The layering system solves a fundamental problem in outdoor clothing: your body temperature changes dramatically during a hike. You're cold when you start, warm when you're moving hard, cold again when you stop for a break, potentially wet from rain or sweat, and then cold again at the summit or in the evening. A single jacket can't handle all of those conditions. A system of three layers, each with a specific function, lets you add and remove as conditions change.
The three layers are: a base layer that moves sweat away from your skin, a mid layer that provides insulation, and a shell layer that blocks wind and rain. Each layer needs to work with the others, moisture has to be able to move outward through all three, and the layers need to fit over each other without creating bulk that restricts movement.
Layer 1: The Base Layer
The base layer is the most important layer to get right because it's in direct contact with your skin all day. Its job is to wick moisture (sweat) away from your skin and move it outward toward the mid layer. A wet base layer makes you cold when you stop; a good wicking base layer keeps you dry and comfortable across a wide range of exertion levels.
What it must do: Wick moisture efficiently and dry quickly. It must not be cotton, cotton absorbs and holds moisture rather than moving it outward.
Best materials:
- Merino wool: The premium choice. Patagonia Capilene Cool Merino (~$95 shirt), Smartwool Merino 150 or 200, Icebreaker 150 or 200. Merino excels at odor resistance (you can wear it multiple days), temperature regulation across a wide range, and comfort against skin. Slower to dry than synthetic but more versatile across conditions.
- Synthetic (polyester/nylon): Patagonia Capilene Cool Daily (~$45), REI Co-op Lightweight Base Layer. Dries significantly faster than merino, more durable, less expensive. Better choice for high-output single-day activities where drying speed matters and odor accumulation isn't an issue.
Weight to choose: Lightweight base layers (merino 150, synthetic lightweight) work for warm weather and high-output activities. Midweight (merino 200, synthetic midweight) for shoulder seasons and moderate temperatures. Heavyweight (merino 250+, Patagonia Capilene Thermal Weight) for cold conditions where the base layer is doing meaningful insulation work.
Layer 2: The Mid Layer
The mid layer is your primary insulation, it traps warm air close to your body. This is the layer you add when you stop moving, remove when you start sweating, and adjust most frequently during a day of hiking. It needs to compress and pack easily, breathe well enough to wear while moving in cool conditions, and provide enough warmth to be useful when stationary in cold weather.
Fleece mid layers: Fleece is breathable, dries quickly, and performs when wet, making it the best mid-layer choice for wet climates or high-output activities. The Patagonia R1 Fleece (~$130) is the benchmark, it's the mid layer guide leaders, mountain guides, and experienced backcountry travelers consistently reach for. The grid fleece construction is more breathable than flat fleece and adds meaningful warmth without excessive weight. The Patagonia R2 is a warmer, heavier version for colder conditions.
Down insulation: Down is warmer for its weight than any other insulator and compresses into a tiny stuff sack. The Patagonia Down Sweater (~$280) and Arc'teryx Cerium SL Hoody (~$350) are the best options. The critical limitation: down loses all insulating value when wet and takes a long time to dry. Down mid layers belong in dry conditions or as camp layers, not as a mid layer in the Pacific Northwest in November.
Synthetic insulation: PrimaLoft and Polartec synthetic insulation retain most of their warmth when wet and dry faster than down. Patagonia Nano Puff (~$230), Arc'teryx Atom LT (~$280). Heavier and bulkier than down for equivalent warmth, but safer in wet conditions. The best mid layer choice if you hike in places where rain is likely.
Layer 3: The Shell Layer
The shell layer's job is to block wind and rain from reaching your insulation layers. It is not primarily a warmth layer, a shell over a good base and mid layer will keep you warm even in cold conditions; a shell alone without insulation underneath won't. The key performance tradeoff in shells is waterproofing vs. breathability.
Hard shells (waterproof-breathable): These use a Gore-Tex or similar membrane that blocks liquid water but allows water vapor (sweat) to pass through. They're the right choice in sustained rain. The budget standard is the Marmot PreCip Eco (~$110), it's genuinely waterproof and acceptable breathability for the price. The upgrade option is the Arc'teryx Beta SL (~$400), meaningfully more breathable, better construction, and Arc'teryx's no-questions warranty. For most hikers, the Marmot is enough.
Softshells (water-resistant): Softshells are stretchy, highly breathable, and comfortable to wear while moving. They repel light rain but will soak through in sustained precipitation. Great for dry-but-windy conditions, shoulder season hiking in climates with light rain, and high-output activities where breathability matters more than perfect waterproofing.
Insulated shells: A waterproof shell with insulation built in, combines the shell and mid layer into one piece. Convenient but less versatile than a separate mid and shell that you can mix and match. Best for winter hiking or alpine use where you won't be adding and removing layers frequently.
The System in Practice
Summer day hike: Base layer only (lightweight synthetic tee), shell in your pack. Add the shell if it rains.
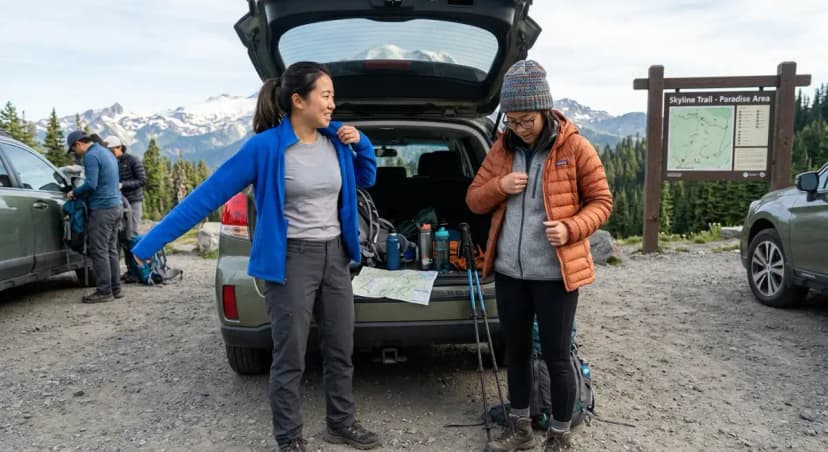
Fall day hike: Lightweight merino base, fleece mid in your pack, hard shell. Start in the fleece on a cold morning, stuff it when you warm up moving, pull out the shell if rain arrives.
Cold weather or alpine: Midweight base, fleece or synthetic insulated mid worn while moving, down mid for breaks and camp, hard shell over everything in precipitation.
Winter hiking: Heavyweight thermal base (top and bottom), thick fleece or synthetic insulated jacket, insulated pants or softshell pants, hard shell over everything, plus insulated gloves, beanie, and neck gaiter. This is a real layering system, six or more pieces working together.
Common Layering Mistakes
Overheating in a down jacket while moving: Down jackets are designed for when you're stationary. Hiking in one means sweat saturates the fill, reduces loft, and leaves you cold when you stop. If you're moving hard, a fleece mid layer is almost always the right choice over down.
Using a shell that's too warm: Insulated shells are tempting but limit your flexibility. A non-insulated hard shell over your mid layer lets you precisely calibrate warmth. An insulated shell makes you choose between being too hot or removing it and being too cold.
Skipping the base layer: A fleece directly on skin without a wicking base is uncomfortable, doesn't wick sweat efficiently, and the fleece will hold odor much faster. The base layer is not optional, it's the foundation of the whole system.
How to Layer for Hiking: The 3-Layer System Explained FAQs
Base layer (wicking), mid layer (insulation), and shell layer (wind/rain protection). The base layer moves sweat away from your skin. The mid layer traps warm air for insulation. The shell blocks wind and rain from reaching your inner layers. Each layer needs to breathe and work together to allow moisture to move outward.
Merino wool for multi-day trips (odor resistance is critical), synthetic polyester for single-day high-output hikes (faster drying). Both are dramatically better than cotton. Never use cotton as a base layer for hiking, it holds moisture against your skin, doesn't dry, and in cold conditions can lead to hypothermia.
In summer on a warm day, you may only wear a base layer with the mid and shell in your pack for emergencies. In fall or in mountains where weather changes fast, carrying all three layers is basic safety, they don't weigh much and the consequences of being caught in a cold storm without insulation and a shell are serious. A compact fleece and ultralight rain jacket add minimal weight and maximum security.
Fleece for wet climates and high-output activities, it breathes better while moving and retains warmth when wet. Down for dry conditions and cold temperatures where you're stationary, it's warmer for its weight when dry. The Patagonia R1 Fleece is the best all-around mid layer for active hiking. Down jackets are better as camp layers or in dry alpine conditions.
Four to six for serious cold. Heavyweight thermal base top and bottom (2 pieces), insulated mid layer, fleece or second insulated layer for stationary use, hard shell jacket and waterproof pants. Plus accessories: insulated gloves, beanie, neck gaiter, wool socks. Each piece is doing a specific job, you can't consolidate this system into fewer, heavier items and achieve the same performance.