The Core Math: Calories vs. Weight
Before you think about what to eat, you need to know how much to bring. The standard backpacking rule is 1.5 to 2 pounds of food per person per day, which delivers approximately 2,500 to 3,500 calories. Most people underestimate how many calories backpacking burns, a 160-lb person carrying a 30-lb pack over 8 miles of trail burns 3,000–4,000 calories a day. Cold weather and high elevation push that number higher.
The reason to target 1.5–2 lbs of food rather than just eating enough is practicality: that weight range consistently delivers adequate calories when you're choosing calorie-dense foods. If you pack light, airy foods, crackers, popcorn, chips, you'll hit 2 lbs without hitting your calorie target. If you pack dense, fatty foods, nuts, olive oil, nut butter, you can hit 3,000 calories in 1.5 lbs.
Calculate your total food weight: multiply daily target (1.5–2 lbs) by number of days, then add 1 extra day's worth as emergency buffer on trips over 5 days.
Calorie Density: Your Most Important Metric
Think in calories per ounce. Any backpacking food worth carrying should clear 100 calories per ounce. The best foods hit 150–200:
- Macadamia nuts: 204 cal/oz, the gold standard
- Olive oil: 240 cal/oz, add to everything
- Almond butter packets: 167 cal/oz
- Dark chocolate: 155 cal/oz
- Almonds: 164 cal/oz
- Freeze-dried meals (Mountain House, etc.): 100–130 cal/oz
- Instant oatmeal: 105 cal/oz
- Ramen: 115 cal/oz
- Jerky: 70–90 cal/oz, lower density but high protein
- Tortillas: 90 cal/oz
Foods to avoid: fresh fruit and vegetables (15–25 cal/oz), canned goods (add water weight), full-size condiment bottles (mostly water and air), anything in glass.
Planning Meals by Day
A practical backpacking meal structure that most hikers land on:
- Breakfast: Instant oatmeal packets (1–2), instant coffee, a nut butter packet stirred in. Takes 5 minutes, 500–600 calories.
- Lunch: No-cook. Tortilla with almond butter and honey, jerky, some crackers and hard cheese, a handful of trail mix. Eat while walking or at a view stop, 600–800 calories spread through the day.
- Dinner: Freeze-dried meal or DIY camp meal (ramen + tuna + olive oil). 500–800 calories depending on meal.
- Snacks throughout the day: Trail mix, bars, nut packets, dried fruit, 500–700 additional calories.
Total: 2,100–2,900 calories. On cold nights or high-output days, supplement with an extra nut butter packet or another snack bar.
Removing Unnecessary Packaging
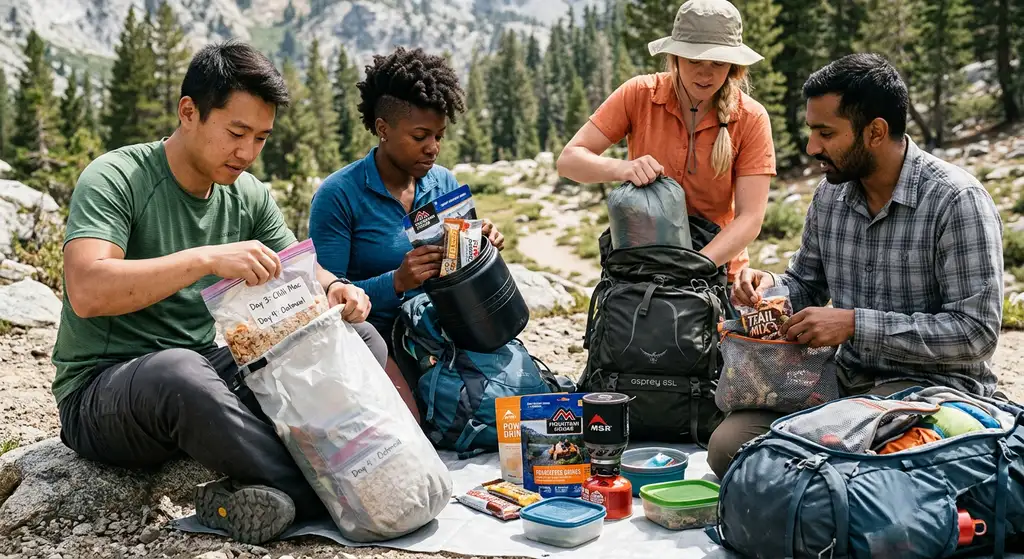
Retail packaging is heavy and bulky. Repackaging at home into lighter containers saves meaningful weight over a multi-day trip:
- Pour granola and oatmeal into zip-lock bags instead of bringing the whole box
- Combine multiple snacks (nuts, chocolate, dried fruit) into a single large freezer bag
- Remove cardboard boxes from instant oatmeal packets, just bring the foil packets
- Decant olive oil from the bottle into a small soft flask (Nalgene makes a 1oz squeeze bottle)
- Cut off excess zipper length from zip-lock bags
Mark each meal bag with a Sharpie, Day 1 Dinner, Day 2 Breakfast, so you know what to grab at camp without digging. Separating meals this way also makes it impossible to overeat early in the trip and run short later.
Bear Safety: Canister vs. Hang vs. Ursack
In bear country, which includes most of the American West, the Sierra Nevada, and parts of the Rockies and Appalachians, you're legally required to store food properly and legally prohibited from leaving it accessible. Three main options:
Bear Canisters
The most secure option and required in many areas (Yosemite, portions of the John Muir Trail, RMNP, parts of the Adirondacks). A hard plastic container that bears cannot open. BV500 by BearVault and the Garcia Backpacker Cache are the two most common. The BV500 holds about 5 days of food for one person. Bear Vault has a clear lid so you can see what's inside. Downside: heavy (2–3 lbs), awkward cylinder shape that wastes pack space.
Store canisters 200 feet from your tent and 200 feet from any water source. Don't put them near cliff edges, bears have learned to roll them off cliffs to crack them open at some locations. Just set them on flat ground.
Bear Hang (PCT Method)
Requires a suitable tree, at least 15 feet of paracord, and practice. The PCT method (also called the counter-balance or two-bag hang) is more reliable than a single-bag hang. You're looking for a branch at least 15 feet off the ground, extending at least 6 feet from the trunk. Your food bag hangs at least 10 feet from the ground and 6 feet below the branch. This is harder to achieve than it sounds in the field, trees are rarely cooperative.
A bear hang fails if: you choose a dead branch (won't hold weight), the branch is too close to the trunk (bears shimmy out), or the bag is within swatting reach from above. Practice at home before relying on it in the backcountry.
Ursack
A soft, bear-resistant bag made from UHMWPE (Spectra) fabric that bears can't chew through. Tie it to a tree at head height, it doesn't need to be hung. The Ursack Major is lighter than a hard canister (7.6 oz) and packs flat. Approved by the USDA as bear-resistant but not accepted in all areas that require hard canisters, check local regulations before relying on one.
Ursacks are excellent where accepted. They don't protect against black bears that have learned to grab and thrash bags for extended periods (which happens in popular areas), but they prevent the actual breach of your food supply.
What Goes in Bear Storage
Everything with a scent. This includes:
- All food, including fresh and cooked
- Trash and food wrappers
- Cooking pots and utensils that touched food
- Toothpaste and lip balm
- Sunscreen and insect repellent
- Soap and hand sanitizer
People underestimate the scent radius. Bears can smell food at 20 miles under the right conditions. Eating in your tent is one of the worst things you can do in bear country. Always cook and eat at least 200 feet from where you sleep.
Cooking Systems and Fuel
Most backpacking meals require only boiling water. A canister stove (Jetboil Flash, MSR PocketRocket 2, BRS-3000T) and an isobutane canister covers the majority of trips. The BRS-3000T at $15 is one of the lightest stoves made; the Jetboil system is faster and more fuel-efficient for its integrated pot design.
Fuel consumption: a standard 100g canister lasts approximately 3–4 days for one person boiling water twice daily. On a 5-day solo trip, bring 2 canisters. Cold temperatures and high altitude reduce efficiency, err toward more fuel than you think you need.
No-cook alternatives work well in summer: cold-soak meals use a wide-mouth jar and cold water to rehydrate ramen, mashed potatoes, or couscous over 30–60 minutes. This eliminates the stove entirely, saves weight and complexity.
Dealing with Altitude and Appetite
Above 10,000 feet, many hikers lose appetite, altitude suppresses hunger even as caloric need increases. Force yourself to eat at the usual intervals. Don't wait for hunger to remind you, by the time altitude-related appetite returns, you're already in deficit.
Foods that work better at altitude: salty snacks (altitude increases sodium cravings), crackers and dry carbs, broth-based soups. Foods that work worse: heavy fatty meals (take longer to digest at lower oxygen levels), alcohol (dramatically worse effects at altitude), and anything that already gives you GI trouble at sea level.
How to Pack Food for Backpacking FAQs
Target 1.5 to 2 pounds of food per person per day, which delivers 2,500–3,500 calories depending on what you choose. Cold weather and high elevation increase caloric needs, go toward 2 lbs per day in those conditions.
No, requirements vary by location. Bear canisters are legally required in places like Yosemite, parts of the JMT, and Rocky Mountain National Park. In many other areas, a proper bear hang or Ursack is acceptable. Always check regulations for the specific area before you go.
Remove all retail packaging, use zip-lock bags, and choose high-calorie-density foods (nuts, olive oil, nut butter, dark chocolate). Olive oil at 240 calories per ounce is the most calorie-dense food you can carry. Macadamia nuts and almond butter are close behind.
Technically yes, but you'll want hot food after a cold day. A mix of no-cook snacks during the day and one hot meal at night is the most practical approach for 3+ day trips. The psychological value of a hot dinner should not be underestimated.
Use your bear canister consistently, the hard plastic contains odors far better than soft bags. Double-bag anything particularly fragrant (fish, strong cheese). Keep wrappers inside the canister until you're at a trash station. The canister itself doesn't need to be washed between trip days.