Why Waterproofing Wears Off, and Why You Have to Re-apply
Your hiking boots left the factory with a DWR (Durable Water Repellent) coating on the outer fabric or leather. That coating causes water to bead up and roll off rather than soaking in. After 15–40 hours of trail use, depending on terrain, laundry, and UV exposure, that coating degrades. Water stops beading and starts soaking into the upper. Your foot gets wet. Your blister count doubles.
The membrane inside (Gore-Tex, eVent, or similar) is still doing its job. But once the outer material is saturated, it creates what's called "wet out", the membrane can't breathe properly because wet fabric blocks vapor transfer. You end up with sweaty, clammy feet even when no water is coming through. Re-treating the outer restores both waterproofing and breathability.
Leather vs. Synthetic: Different Boots Need Different Products
The single biggest mistake people make with boot waterproofing is using the wrong product for their boot material. Using a silicone spray on full-grain leather darkens it and leaves a tacky residue. Using wax on mesh panels seals the pores and kills breathability. Match the product to the material.
Full-Grain Leather Boots
Full-grain leather is the traditional material for heavy mountaineering and backpacking boots. It's the most durable and the most water-resistant from the factory, but it needs conditioning as well as waterproofing, leather dries out and cracks without regular treatment.
- Nikwax Leather Proof, water-based, cleans and waterproofs in one step, won't darken leather significantly, breathable. Best all-around choice.
- Sno-Seal, beeswax-based, excellent waterproofing, but reduces breathability noticeably. Good for wet conditions where breathability is secondary (PNW hiking in November).
- Atsko Sno-Seal with Beeswax, similar to original Sno-Seal, can be warmed and worked in with fingers for deeper penetration.
Nubuck and Suede Leather Boots
Nubuck and suede have a brushed, matte finish and are more porous than full-grain. They absorb waterproofing products quickly and can darken with wax-based treatments.
- Nikwax Nubuck and Suede Proof, water-based spray, maintains original color better than wax alternatives, keeps the nap texture.
- Grangers Performance Repel Spray, works well on suede and nubuck, dries relatively quickly, available widely.
Synthetic and Mesh Boots
Synthetic uppers and boots with significant mesh panels need a spray-on treatment, anything wax-based will clog the mesh and destroy breathability.
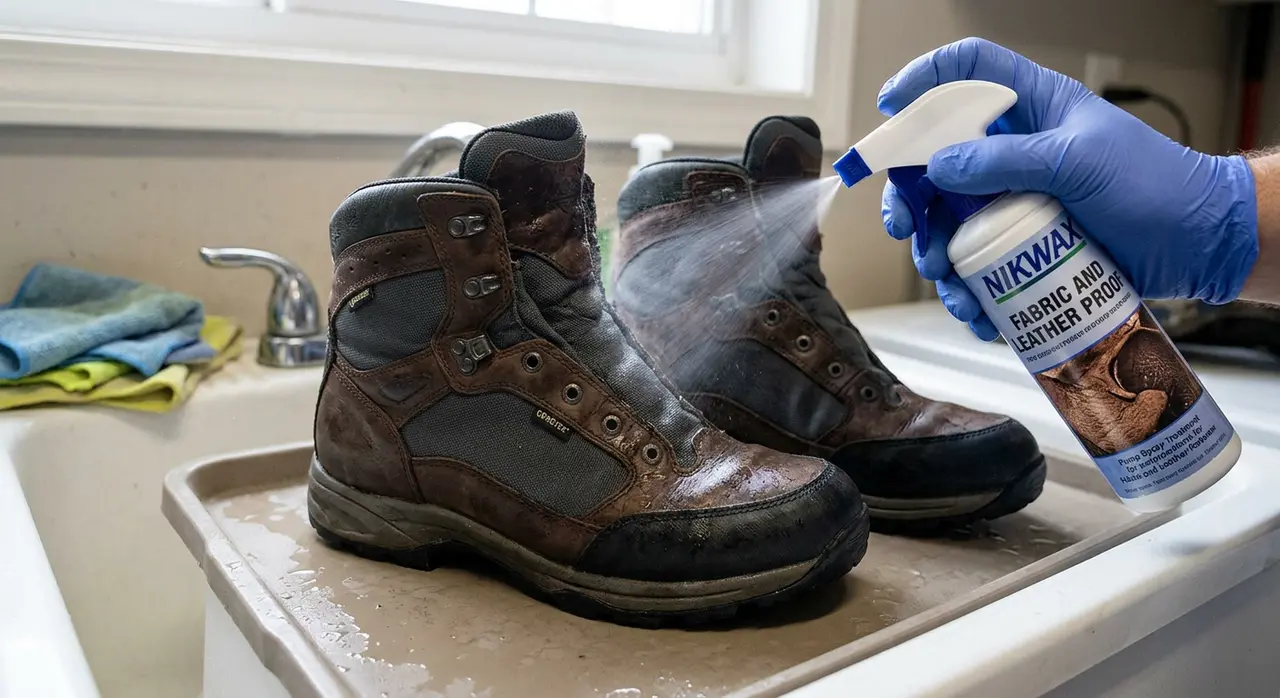
- Nikwax Fabric and Leather Proof, works on boots with both fabric and leather panels (the most common combination in mid-weight hiking boots).
- Grangers Performance Repel Plus, fluorocarbon-free spray, works on synthetic, mesh, and Gore-Tex.
- Gear Aid Revivex Spray, popular option, widely available at REI and outdoor stores.
Step-by-Step: How to Waterproof Your Boots
The process takes about 20 minutes of active time plus drying. Don't rush the drying, inadequately dried boots before treatment means the product won't bond properly.
Step 1: Clean the boots thoroughly
Remove the laces and insoles. Knock off dried mud. Wash the boots with a boot-specific cleaner (Nikwax Boot Wash or Gear Aid Revivex Boot Cleaner), not dish soap, which strips the existing DWR faster. Use a soft brush to work the cleaner into all the seams and fabric. Rinse with cool water.
Step 2: Apply while damp
This is the step most people skip and it matters: apply the waterproofing product while the boots are still damp, not dry. A damp surface opens the fibers and leather pores, allowing the waterproofing compound to penetrate deeply rather than sitting on the surface. Pat off excess surface water with a cloth, but don't dry the boots out.
Step 3: Apply the product evenly
For sprays: hold the can 6–8 inches from the boot, spray in overlapping passes, and work it into seams with your fingers or a cloth. Don't forget the welt (where the upper meets the sole), this is the first place water enters.
For creams and waxes: use your fingers or a cloth applicator. Work the product into the leather in small circular motions. Apply a heavier coat to the welt seam and toe box. If using Sno-Seal, warm the wax slightly by holding the container in your hands for a few minutes, it spreads much more easily.
Step 4: Heat activate
Wax-based products benefit from heat to drive them deeper into the leather. After applying, use a hairdryer on low heat for 2–3 minutes per boot, or set boots near (not on) a heat source. Watch for darkening, pull back if the leather gets too warm to touch. Spray products generally don't need heat activation, but 15 minutes in warm sunlight helps.
Step 5: Wipe off excess and dry completely
Wipe off any excess product with a clean cloth. Let boots dry at room temperature for at least 24 hours before wearing. Avoid direct heat (radiators, campfire), it dries out leather and can warp the sole glue.
How Often to Re-treat
The honest answer: when water stops beading. The more useful answer: check your boots every 15–20 trail hours and re-treat proactively before you notice failure.
Here's a simple test. Pour a small amount of water on the boot upper. If it beads up and rolls off, you're fine. If it spreads and darkens the fabric within a second or two, it's time to re-treat. Don't wait until your feet are wet on trail.
General guidelines:
- Light day hikers (mesh/synthetic, dry conditions): treat every 20–30 hours of use or twice per season.
- Mid-weight leather or hybrid boots (variable conditions): treat every 15–20 hours or at the start of any wet-season trip.
- Heavy-use leather boots (year-round, all conditions): treat every 10–15 hours plus full conditioning with a leather conditioner twice per year.
Laundry significantly degrades DWR, if you machine-wash your boots (not recommended for leather, acceptable for synthetic), re-treat immediately after.
Mistakes That Reduce How Long Waterproofing Lasts
- Drying boots on a radiator or by a fire, high heat destroys DWR faster than trail use. Air dry at room temperature.
- Storing wet boots, fold-over waterproofing fails when the boot stays wet for days. Dry thoroughly between trips.
- Applying over dirt, dirt particles prevent the waterproofing compound from bonding. Always clean before treating.
- Using the wrong product, wax on mesh, silicone on leather. As described above.
- Skipping the welt, the seam where upper meets sole is where most water infiltration happens. Spend extra time there.
A Note on Gore-Tex and Membrane Boots
If your boots have a waterproof membrane (Gore-Tex, eVent, Outdry), the membrane itself is not what you're treating when you waterproof, the outer material is. The membrane handles waterproofing from inside out (stopping liquid water from entering). The DWR coating handles it from outside in (preventing the outer material from saturating). Both matter. Treat the outer as described above. If the membrane itself fails (water is coming through on the inside of the boot), no amount of DWR treatment will fix it, the membrane is worn out and the boots need replacement or manufacturer warranty service.


