Why the Bear Hang Is Harder Than It Sounds
The bear hang looks simple on paper, throw a rope over a branch, hang your food bag high enough that bears can't reach it. In practice, it fails constantly in the field. The right branch doesn't exist at camp. It's dark and you're tired. You throw 50 times and the throw line keeps falling short. The bag isn't high enough. You got the hang right but forgot to store your toothpaste in it.
Bears in high-traffic areas have learned to associate humans with food. In Yosemite, black bears have watched thousands of bear hangs and know exactly how to defeat every common mistake. That's why hard-sided canisters are required in Yosemite, not because hangs are impossible, but because imperfect hangs in a bear-dense area fail frequently enough to create habituated bears.
In lower-traffic areas, a good bear hang is effective and sufficient. Here's how to execute one that actually works.
What You Need
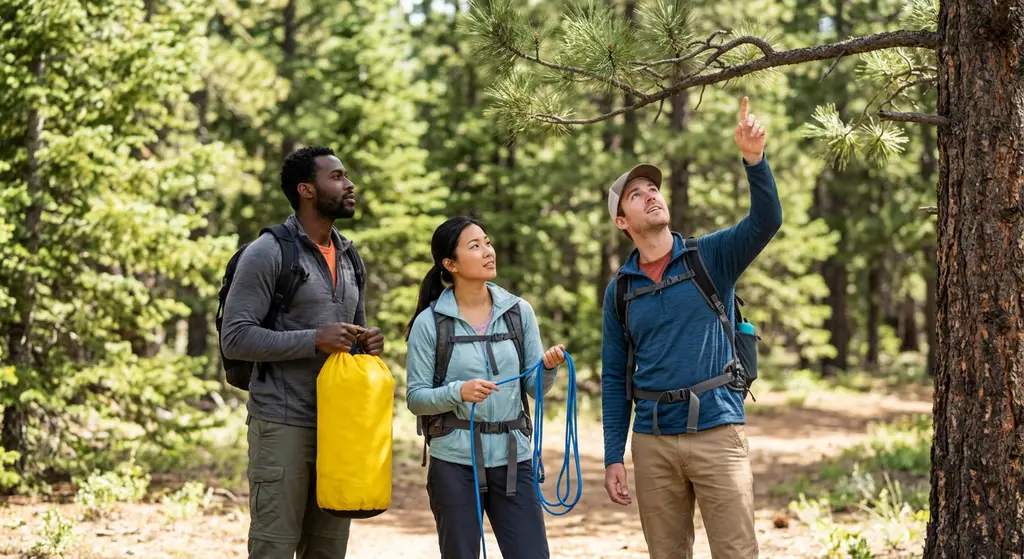
- 50 feet of paracord or lightweight rope (Spectra or Dyneema cord is lighter and stronger)
- A stuff sack or dry bag for your food A small rock or stuff sack filled with dirt to use as a throw weight
- A carabiner (optional but helpful)
The 50-foot length is non-negotiable. Most failed bear hangs involve people who brought 30 feet and couldn't reach a suitable branch. 50 feet gives you workable margin for most trees. Paracord (550 cord) weighs about 1 oz per 10 feet and costs almost nothing. Bring 50 feet minimum; 60 doesn't hurt.
Choosing the Right Tree
This is where most people fail. You need a living tree, dead branches break under weight. You need a branch that is:
- At least 15–20 feet off the groundblack bears can reach up to 10 feet standing, and they'll climb if they smell food
- At least 6 feet from the trunkbears shimmy up trunks and reach out; your hang point needs to be far enough out that a bear on the trunk can't grab the rope
- Strong enough to hold your food bag's weighttest by finding similar-diameter branches and seeing how they flex; wrist-thick branches generally handle 20–30 lbs
In practice: look for a branch approximately thumb-to-wrist diameter about 15–20 feet up, extending well away from the trunk. The branch should flex slightly under tension but not be a spindly twig. Hardwood trees (oak, maple, beech) are better than softwood (pine, fir), which are branchier but often have softer, more breakable limbs.
Scout your hang site before dark. Everything gets harder in headlamp light.
The PCT Method (Single Line, Simple Stick)
The PCT method (also called the simple hang or ranger hang) is the most practical for most backpackers:
Step 1: Tie your throw weight (a rock in a bag, or a stuff sack with dirt) to one end of the cord. Practice a few throws at home so you know how to arc it.
Step 2: Throw the cord over the target branch. The throw weight pulls the cord over. This usually takes several attempts, be patient. If you consistently hit the wrong branch, aim differently. The cord should hang over the branch with both ends accessible below.
Step 3: Detach the throw weight and tie your food bag to one end of the cord using a secure knot (bowline, or simply clip a carabiner through the bag handle and tie to that).
Step 4: Haul the food bag up by pulling the other end of the cord. Raise the bag until it's at least 10–12 feet off the ground and 6+ feet below the branch (so a bear on the branch can't reach down).
Step 5: Secure the remaining cord by wrapping it around the tree trunk 5–6 times and tying it off with multiple half-hitches. Don't tie directly to the branch, if a branch breaks or a bear disturbs it, you want the anchoring point separate.
The final position: food bag hanging 10–12 feet off the ground, 6+ feet below the branch point, 6+ feet from the trunk. Getting all three targets simultaneously requires a branch that's at least 16–18 feet high and far enough from the trunk, this is why finding the right tree matters so much.
The Counterbalance Method
The counterbalance uses two bags of equal weight on opposite ends of the cord, hanging at the same height so neither can be pulled down without simultaneously raising the other. This is harder to set up correctly and has largely been replaced by the PCT method and canisters in most areas, but it remains an option:
Step 1–2: Same as PCT, throw cord over branch at 15+ feet, 6+ feet from trunk.
Step 3: Tie the first food bag to one end of the cord at a height where it's 10+ feet off the ground.
Step 4: Using a stick to extend your reach, push the second food bag up to match the height of the first. Both bags should be at eye level (10+ feet) on opposite sides.
Step 5: Release both bags. If balanced, neither can be lowered without raising the other. A bear pushing one bag raises the other, theoretically defeating the hang.
The limitation: counterbalance requires two roughly equal-weight bags, a suitable branch, and significant patience to set up. And bears in high-use areas have learned to bat both bags simultaneously. The PCT method with proper geometry is more reliable and far simpler to execute.
What Goes in the Bear Hang
Everything with a scent, which is more than most people expect:
- All food, including cooked food and scraps
- All food trash and wrappers
- Cooking pots and utensils that contacted food
- Toothpaste, floss, lip balm
- Sunscreen and insect repellent
- Hand sanitizer and soap
Bears are attracted by scent, not by whether something is technically "food." Lip balm smells like food to a bear. Chapstick has been confirmed to attract bears. Don't leave anything scented in your tent or in a jacket pocket outside the hang.
Where to Hang
The hang site should be:
- 200 feet from your sleep site
- 200 feet from any water source
- Downwind from camp when possible
The 200-foot rule is the Leave No Trace standard. It puts the food odor source far enough from your tent that a bear investigating the smell doesn't stumble onto your camp. Pacing 200 feet in the dark is annoying, which is why most people find their hang tree before dark and plan the camp layout accordingly.
Alternatives to Bear Hangs
Bear canisters: Required in many areas. Heavier (2–3 lbs) but require zero technique, just store everything inside and set the canister on flat ground 200 feet from camp. Bears can't open them and eventually give up. BearVault BV500 and Garcia Backpacker Cache are the standard options. Bear Vault has a clear lid, which lets you see contents without opening. Both hold roughly 4–5 days of food for one person.
Ursack: A soft bear-resistant bag made from Spectra fabric. Bears can't chew through it. Tie it to a tree at head height, no hanging required. Weighs 7.6 oz vs. 2–3 lbs for hard canisters. Approved by USDA but not accepted everywhere that requires hard canisters. Check area regulations.
Electric fence: Used at established campsites in some areas (Denali, certain Alaskan sites). Not relevant for most backpackers.
If You're in a Bear Canister-Required Area Without One
Use what you have. An imperfect hang is better than no protection. If your cord is too short, hang as high as you can and get as far from the trunk as possible. Use multiple shorter pieces of cord tied together. Get creative, clip your food bag to a long stick wedged in a fork. In a real pinch, sleeping with food in a tent is the worst option; a poor hang outside is better than food inside with you.
How to Hang a Bear Bag: The PCT Method and Other Techniques FAQs
The food bag should hang at least 10–12 feet off the ground, at least 6 feet below the branch it hangs from, and at least 6 feet out from the tree trunk. All three targets need to be met simultaneously, which is why finding the right branch matters so much.
In areas with habituated, experienced bears (like Yosemite), even a technically correct hang can fail. That's why hard canisters are required there. In lower-traffic areas with less experienced bears, a good PCT-method hang is reliably effective.
Minimum 50 feet. Many people bring 30 feet and find it insufficient for reaching suitable branches. 50–60 feet gives you workable margin. Paracord weighs about 1 oz per 10 feet, 50 feet is 5 oz and costs $5.
Yes, from a pure reliability standpoint. Canisters require no technique, no suitable trees, and work in any terrain. They're heavier and take up pack space, but they're the standard in bear-dense areas for good reason. In lower-traffic backcountry with good trees, a proper hang is sufficient.
Yes. Everything with a scent goes in bear storage, toothpaste, lip balm, sunscreen, insect repellent, soap, and hand sanitizer. Bears are attracted by scent, not just food. Leaving these items in your tent significantly increases the chance of a bear investigating.