Step 1: Pack the Bottom (Light + Bulky Items)

Step 1: Pack the Bottom (Light + Bulky Items)
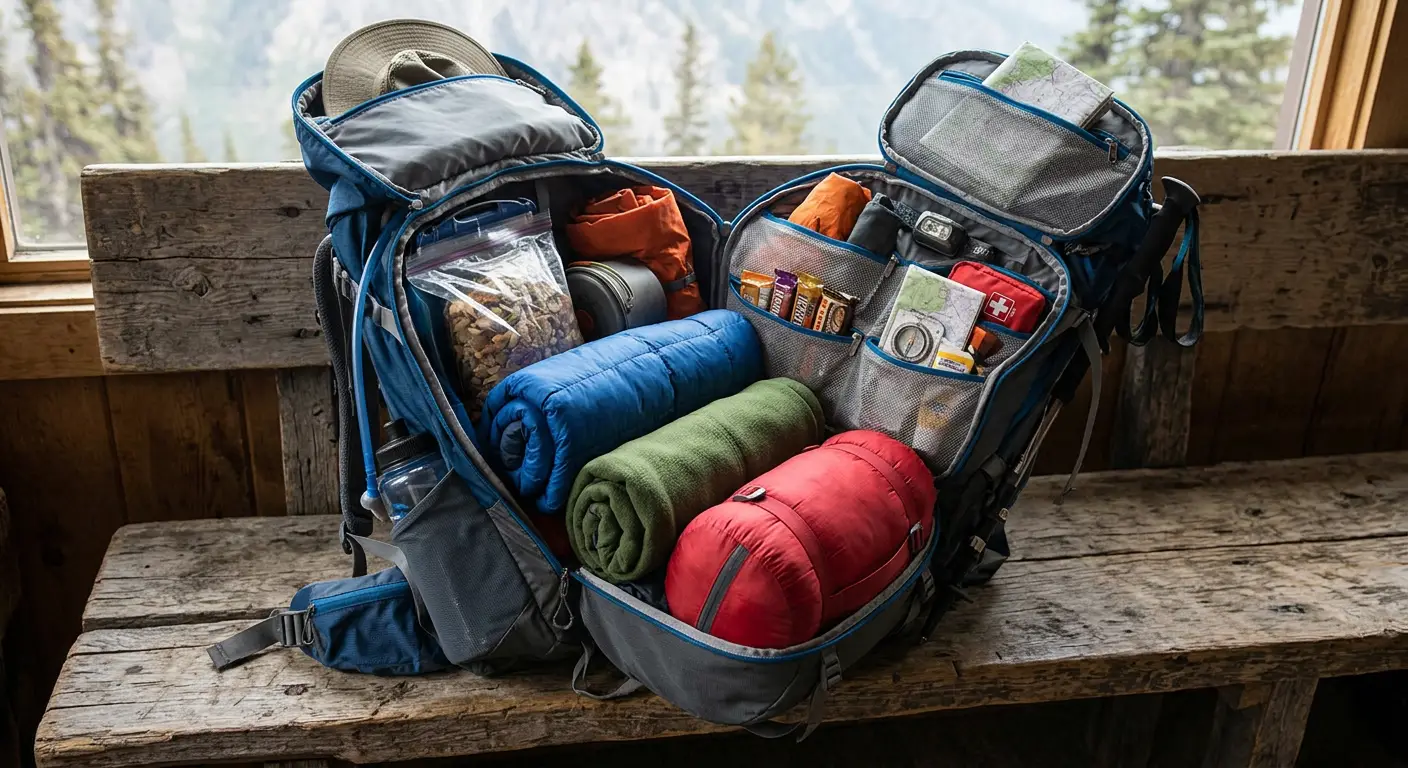
Start by packing the bottom of your hiking backpack with light and bulky items you won’t need during the day.
This includes a sleeping bag, sleeping pad, and extra clothes. These items are soft and compressible, creating a stable base that supports the rest of your gear.
Keeping lightweight gear at the bottom helps improve weight distribution and prevents your backpack from feeling unbalanced on the trail.
Think of this layer as your foundation — light, soft, and only needed once you reach camp.
Step 2: Pack the Middle (Heavy Items Close to Your Back)
The middle of your backpack is the most important area for proper weight distribution.
Place heavy items like your water reservoir, food, and cooking gear here, making sure they are centered and positioned close to your back.
This helps maintain your natural center of gravity, reduces strain on your shoulders, and improves balance on uneven terrain.
If you only remember one rule, this is it: keep heavy items close to your spine.
Step 3: Fill the Middle Outer Area (Medium-Weight Gear)
Once your heavy items are in place, fill the surrounding space with medium-weight gear.
Pack items like extra layers, a rain jacket, and a first aid kit around your core gear.
This step removes empty space inside your backpack and prevents items from shifting while you hike.
A tight, well-packed backpack feels significantly more stable and comfortable over long distances.
Step 4: Pack the Top (Quick Access Essentials)
The top of your hiking backpack should be reserved for items you need throughout the day.
This includes snacks, sunscreen, gloves, a headlamp, and navigation tools like a map or GPS.
Keeping these essentials on top allows you to grab them quickly without unpacking your entire bag.
Easy access saves time and keeps your hike smooth and efficient.
Step 5: Use External Pockets for Easy Access
External pockets are perfect for items you want to access quickly without opening your main compartment.
Use them for water bottles, trekking poles, wet gear, or trash.
This keeps your main compartment organized while making essential items easy to reach during your hike.
Smart use of outer pockets improves both convenience and overall organization.
Step 6: Adjust Your Backpack for Proper Weight Distribution
Once your backpack is fully packed, adjusting it correctly is just as important as how you packed it.
Tighten compression straps to stabilize the load, adjust your shoulder straps, and secure the hip belt snugly around your hips.
Most of the weight should sit on your hips — not your shoulders.
Proper adjustment reduces fatigue, improves comfort, and prevents strain on long hikes.
Common Backpack Packing Mistakes to Avoid
Even small packing mistakes can make your backpack feel much heavier than it actually is.
Avoid placing heavy items far from your back, overpacking unnecessary gear, leaving empty space inside your pack, or storing frequently used items too deep.
These mistakes lead to poor balance, shifting weight, and increased fatigue on the trail.
Packing your backpack correctly makes a huge difference in comfort, stability, and overall hiking experience.
